
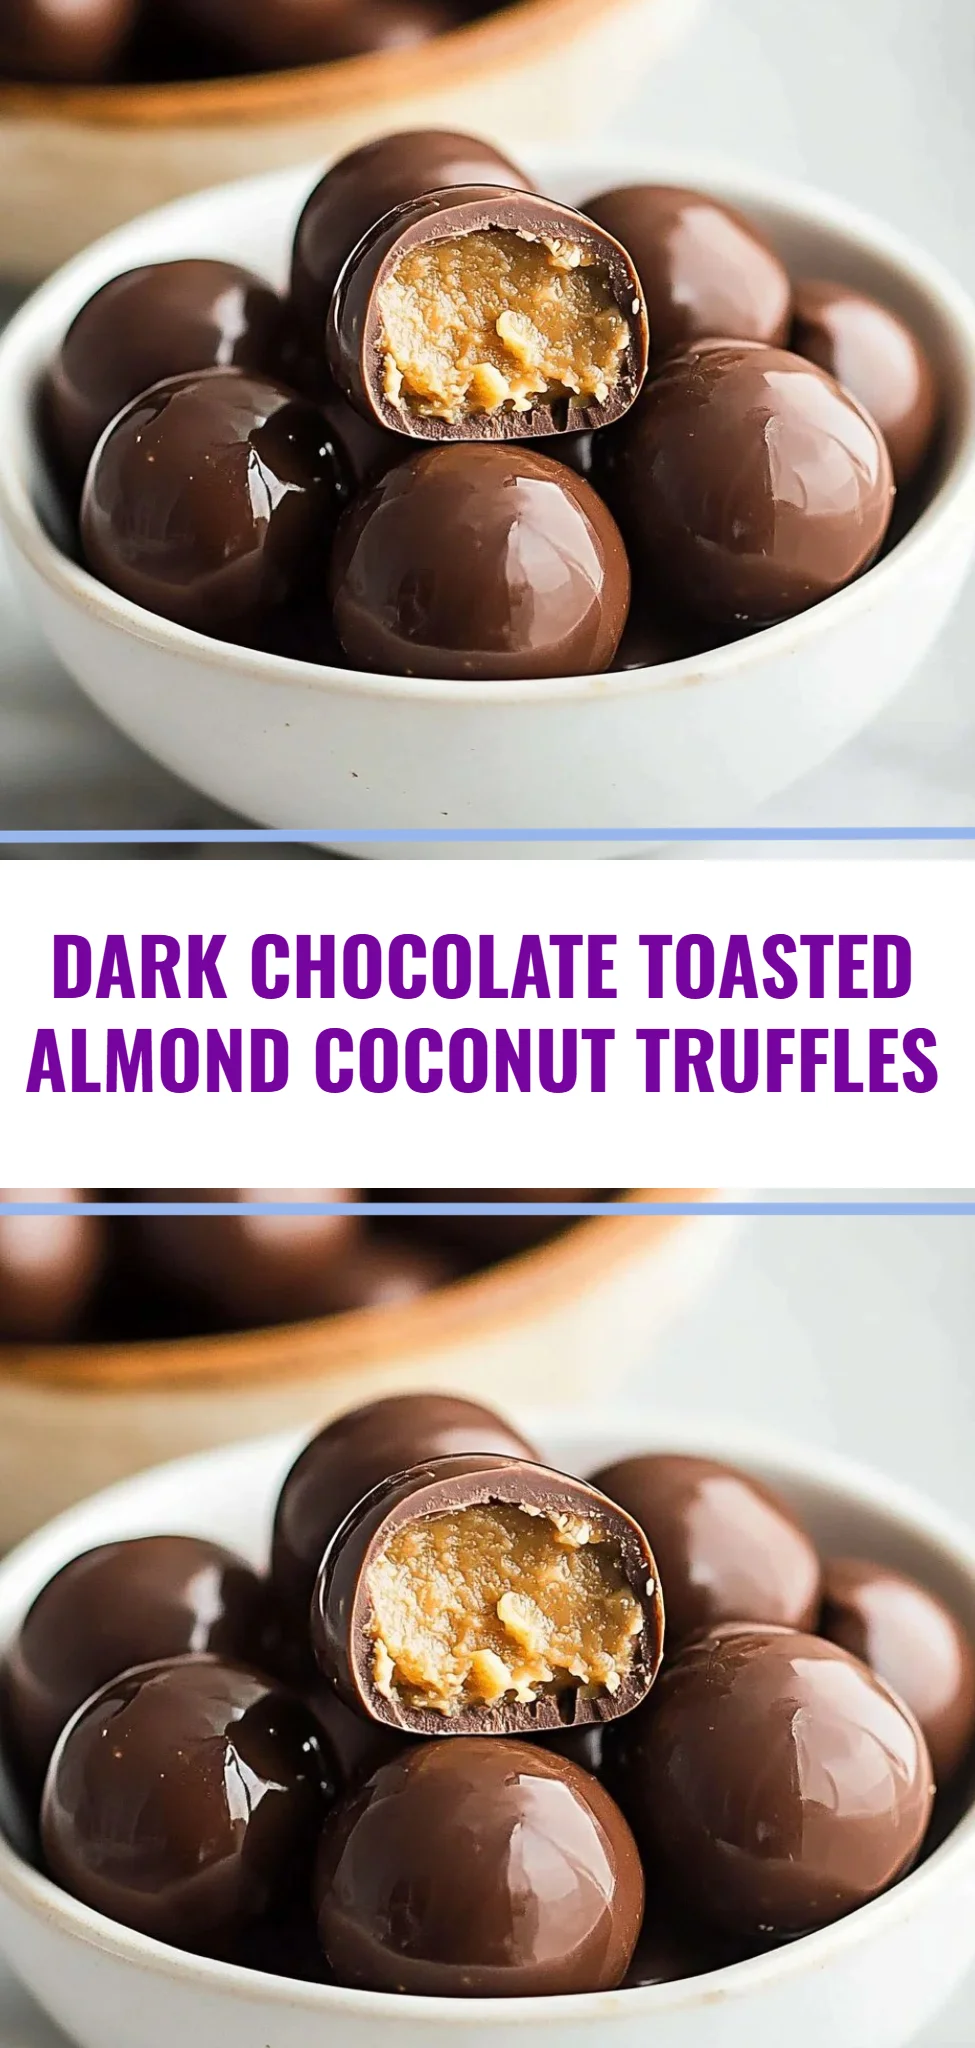
Dark Chocolate Almond Joy Truffles Filled with Toasted Almonds and Coconut are a delightful indulgence that combines the rich flavors of dark chocolate with the sweet, chewy goodness of coconut and the crunchy texture of almonds. This recipe is a step-by-step guide to creating these delectable truffles in your own kitchen, perfect for satisfying your sweet tooth or impressing your family and friends at gatherings. With their creamy and aromatic allure, these truffles are simple to make and evoke a sense of nostalgia, making them a fantastic addition to your dessert repertoire.
Ingredients
To craft these luscious truffles, gather the following ingredients:
- 2 cups sweetened shredded coconut: Tiny shreds of coconut that contribute a sweet, chewy texture.
- 1/2 cup sweetened condensed milk: A rich, creamy base that binds the coconut together and adds a comforting sweetness.
- 1/2 tsp vanilla extract: The aromatic essence that elevates the flavors with a hint of warmth.
- 24 whole toasted almonds: Crunchy delights that not only provide texture but also enhance the nutty flavor.
- 8 oz dark chocolate, chopped (or dark chocolate chips): Velvety chocolate that envelops the truffles in a luxurious coating.
- 1 tsp coconut oil (optional): This adds a glossy finish to the chocolate and ensures a smooth dipping experience.
Cooking Time & Tips For Dark Chocolate Almond Joy Truffles
The preparation time for these truffles is quick and can take about 30 minutes, with an additional chilling period to allow the chocolate to set. For a quick and easy treat, you can have the truffles ready in about an hour, including cooling time. On the other hand, if you prefer a slower approach, allowing the truffles to chill longer can enhance their flavor and texture.
For successful truffles, make sure to work with chopped chocolate that’s high quality for the best melting and flavor. Enjoy the process—clean as you go for a stress-free cooking experience and don’t hesitate to taste the mixture before rolling them into balls!
Step-by-Step Directions
Combine Ingredients: In a medium-sized bowl, mix together shredded coconut, condensed milk, and vanilla extract until fully combined. You’ll want the mixture to be sticky and cohesive, bringing the tropical sweetness to life.
Shape into Balls: Take a tablespoon of the coconut mixture and roll it into a ball about 1-inch in diameter. Press a toasted almond into the center of each ball, ensuring it is well encased. This adds a delightful surprise of crunch when you bite into the truffle.
Freeze the Truffles: Place the formed truffles on a parchment-lined baking sheet and freeze for 20-30 minutes. This step solidifies the truffles and makes them easier to coat in chocolate.
Melt the Chocolate: While the truffles are freezing, melt the dark chocolate and coconut oil together in the microwave using 30-second intervals. Stir in between until the chocolate is smooth and glossy, creating a perfect bathing pool for the truffles.
Dip the Truffles: Once the truffles have chilled, dip each one into the melted chocolate. Allow any excess chocolate to drip off before placing them back on the parchment-lined baking sheet.
Garnish: Before the chocolate sets, sprinkle some shredded coconut or crushed almonds on top of each truffle for an extra touch of beauty and flavor.
Chill and Serve: Refrigerate the truffles until the chocolate hardens, which takes about 15-20 minutes. Once set, they are ready to be savored!
Serving Suggestions & Occasions
These Dark Chocolate Almond Joy Truffles are perfect for various occasions—from casual family gatherings to festive holiday celebrations. Serve them at birthday parties, as a homemade gift during the holidays, or simply enjoy them as a midnight snack while binge-watching your favorite series. Pair them with a cup of your favorite tea or coffee for a delightful afternoon treat!
Common Mistakes For Dark Chocolate Almond Joy Truffles
- Skipping the freezing: Not freezing the truffles before dipping in chocolate can cause them to lose shape.
- Using low-quality chocolate: Choose high-quality dark chocolate for the best flavor and texture; cheap chocolate can result in a waxy coating.
- Overheating the chocolate: Melting chocolate too quickly can cause it to seize; always melt in short bursts.
Healthier Alternatives & Variations
For a healthier twist, consider the following variations:
- Use unsweetened shredded coconut: This option allows you to control the sweetness better.
- Dark chocolate with lower sugar content: Opt for recipes that use bittersweet chocolate or darker varieties for a richer flavor without the added sugar.
- Nut butter centers: Replace the almond with a dollop of your favorite nut butter for a creamy surprise inside.
FAQs
Can I make these truffles vegan?
Yes, you can substitute sweetened condensed milk with coconut cream or a vegan alternative.How long can I store these truffles?
They can be stored in an airtight container in the refrigerator for up to two weeks.Can I freeze the truffles?
Absolutely! Store them in a freezer-safe container for up to three months. Just thaw them in the refrigerator before serving.What can I use instead of nuts?
If you have nut allergies, leave out the almonds or replace them with pumpkin seeds.How can I make these truffles look prettier?
Use colorful sprinkles, edible glitter, or drizzle white chocolate over the top for a festive touch.What if my truffles are too sticky?
If the mixture is too sticky to handle, you can refrigerate it for a short period before rolling it into balls.
Conclusion
There’s no time like the present to get in the kitchen and create these tantalizing Dark Chocolate Almond Joy Truffles Filled with Toasted Almonds and Coconut. Their irresistible combination of flavors and textures will not only satisfy your cravings but also bring a smile to your face. So why wait? Gather your ingredients and get started on making a batch of these delightful treats today—you won’t regret it!